Saturday, August 11, 2012

The Downton Dress.

Are you guys watching Downton Abbey?
You should.
It's a Masterpeice Classic show (comes on PBS) about English Manor life in the early 1900s.  It is *fantastic*.  
It also has the best wardrobe selection of any show I've seen in a long time.  Rivals Mad Men, in fact, for inspiring fashion revolution.  The beaded gowns and silks and minute details, and, oh dear.

I've been so struck by this show that I wanted to make myself a Downton Dress.  But the awesomely vintage-y fabric I picked up on sale wasn't quite enough to make a frock for myself, so the Kenzie girl once again got the new dress.  Lucky duck.  

Without tooting my own horn too too much, this dress is both super cute, and surprisingly well-made.  It's entirely lined, with almost all seams hidden inside the two layers.  Those that face out are french seams.  It's been washed twice now and nothing has frayed or split or unraveled.  Yay- I think I'm finally getting better!


 The bodice is sleeveless, with subtle flutters to the edges.  I did a pleat in the front, as well as princess seams.  And added three super cute frosted grey bauble buttons from my grandmother's stash.


But the back is what I really love.  A circle cutout!  I did that! ;)
It closes with three more of the grey frosted buttons, and a giant vintage wooden button at the top.  The inside is lined with contrasting fabrics- the bottom section is grey and the top is the peachy flowered print.


The bottom is hemmed with a scalloped edge, mirroring the dark brown lines in the fabric.  It also has a slight drop waist with some elastic inside to give it a bit of shape.  


Despite this expression, my girl loves it.  She also loved dressing for these pictures, as she got to wear mommy's fascinator and red lipstick.  I'm pretty darn jealous of the getup....


Here you can see a peek of the contrasting lining.  And a peek of the very rare MacKenzie angel.  


I'm working on a jacket now with a similar turn-of-the-century feel.  It is coming along swimmingly.  Too bad it, too, is child sized.

I need to wise up in my fabric purchasing!

We are now off to get the girl's soccer skills assessed for the upcoming season.  This should be interesting.  Wonder how upset she'll be when she learns tap shoes and dresses aren't allowed on the field....


Wednesday, August 8, 2012

recap.


 Ok, I know.  I JUST posted.  And I promise I won't keep you long.  I have Downton Abbey to watch, afterall.
Just wanted to toss a few pictures up of the girl's first day.
She had fun.  I have a feeling she and her teacher will have a bit of a clash of personalities, though.  There have already been changes made to seating arrangements to try to "tame" MacKenzie's socializing.  The teacher said "we'll work on that..."   Ha. Good luck.

But she can't wait to go back tomorrow and loves her new friends and is just thrilled with the whole adventure.

Here are the obligatory front porch photos.  She was so kind as to allow me to dress her "just the first day", and I selfishly chose a penguin dress I had recently sewn her. It looks much cuter without the tee and leggings, but here in the frozen tundra of Monterey, it's cold even in August.
I found the fabric at Goodwill- it was an old curtain or something. I thought it was all a bit j.crew, and as my daughter is obsesssssed with penguins, totally appropos.  My sister made The Cutest Hairbow Ever to go with it, but it met an untimely end on a walk back from the aquarium the other day.  (I am devastated!)


She quickly decided her giant backpack was a hinderance to her posing.  She was moving so quickly my camera couldn't focus well, but I wanted to post this- just because soon after her brother tried so hard to pose the same way.  The cuteness!


She made a friend in the PARKING LOT!  They were very excited to find they were in the same class together.  


The first thing she did when they gathered at their tables was instruct the other kids on how to do their worksheets.  She was very specific (read: bossy), and followed up frequently on their progress.  I kinda feel like I set her poor teacher up...


She was also quick to loudly point out that her apple name was misspelled.  Sigh.  


While big sissy was at school, the boy helped me bake a cake.  A fellow blogger (and super cool mama) from Hawaii has the sweetest tradition of baking a cake on the first day of school for each of her little girls, decorating them with the appropriate grade number.  I loved looking at the pictures of the cakes through the years so much that I wanted to steal her idea.
We made a super fancy dark chocolate cake with chocolate mousse filling and chocolate icing.  All gluten and dairy free, to boot.  Why gluten and dairy free?  Dunno.  I love wheat....and everyone knows I love me some cheese.  I guess I just wanted to try something different?  Or I felt guilty shopping in Whole Foods for wheat flour and milk?  Or I just wanted to be that granola mom from Cali?
Anyway, it was DELICIOUS.  Seriously, the best chocolate cake I've had in a long time.  Fudgy and rich and really really chocolatey.  Mmmmmm.  


My cake pans were slightly different sizes.  Oops....


I initially tried melting the bunny gummies into the letter "K".  I saw something similar with hard candies....but the bunnies just turned into gooey messes.  In hindsight, that seems obvious, huh?


Her expression upon seeing her cake for the first time.  PRICELESS!!


So, it was a good day.  
I hope this loving school thing lasts!

Tuesday, August 7, 2012

one last hurrah

Tomorrow my baby girl goes to Kindergarten.
I'm excited for her.  I'm sad for me.  I'm relieved for her brother.  I'm...well, a mom on the night before her little girl goes off to school.
It's kinda a big deal, huh?  I remember my first day of Kindergarten- at least in a foggy, tinged by photographs and other people's accounts kind of way. It's the sort of life moment that sticks with you.  I know she'll do great, and my biggest hurdle will be to get her to come home with me again upon pickup.  But it starts a new phase in her life, and that's just...  odd.

[Sucking it up]

Anyway, today was kind of a last hurrah of sorts.  A-one-last-special-weekday-time-with-mommy kind of day.  Sleeping in and staying in pjs and projects and crafts and playing with Playmobil and (the dreaded) My Little Ponies.  We had fun.

I saw this paint-in-bag idea online and thought it might be something the kids could do together.  It was a hit, and it let me make a special breakfast this morning without too much stress.  In fact, they were so well received, that the bags remain up and I don't intend to take them down anytime soon.  That's saying something!

Simply put blobs of different colored paint in a ziplock bag and tape it to the window.  As the paint smears and mixes, sunlight comes through, lending a lovely stained-glass effect.


I also put a bag with glitter, sequins, water, and a bit of oil up.  This one was little man's favorite, and it soon developed a slight leak.  I just double bagged it after that, and placed it flat on his kid table so he could keep playing with it.  


As the colors mixed, some really neat patterns resulted...


MacKenzie found it the perfect medium for doing her beloved swirly-whirlies.  


And Asher loved to sing me the ABCs while I drew out the letters.


But my favorite was their handprints.  Sigh.  Stop growing already!!


During naptime, the soon-to-be-scholar and I did a bit of science.  This slime recipe I found while researching the borax snowflakes from a few weeks ago.  I saw another version of it using glow in the dark paint, and am dying to give that a try.  But I didn't feel like heading to the store for the paint today so we just settled on green food coloring.  

(The recipe:
1 cup water mixed with one 4oz bottle of Elmer's glue.
Dissolve 2 teaspoons Borax into 1/3 cup hot water, and add a bit at a time to the glue mix.)

It'll all clump together like magic.  It has the same consistency as that "fart" slime that Spencer's Gifts used to sell.  Remember that stuff?
It's pretty awesome, and really not very messy at all.  Great for squishing between fingers and pretending to have boogers.  Important lessons for all kids entering kindergarten, don't ya think?


So tomorrow, she'll be off making new friends and laughing and playing and growing up.
But today, I still had her all to myself.


Friday, August 3, 2012

Don't touch the lasers!

Who knew this could be so FUN?
Last night while Mr. and the baby were showering, the girl and I set up a yarn "laser" obstacle course in the laundry room outside the bathroom door.
It was originally just supposed to be a bit of a gag, but Mr. rose to the occasion and immediately started humming the tune to Mission Impossible, while twisting and contorting through the deadly yarn beams.

[A note:
I obviously didn't take the time to stage these photos before hand, hence the less than clean laundry room (but who keeps their laundry room clean?) and lack of proper clothing.  I also couldn't get my flash to work right, so instead of messing with the photos in Aperture for an hour, I just clicked them all to black and white.  There, red eyes fixed ;)]


After Daddy successfully made it through, we all jumped in to have a go....


The kids LOVED it.  They played until bedtime.  Little man would get very concerned when we "buzzed" him, saying "Oh no!  Owbie!!"


Really, it was a blast.  

Go try it!


Monday, July 30, 2012

Today's post is brought to you by the letter...

Now that little man has his own room, and isn't sharing with his super girly-girl sister, I thought perhaps it time to personalize his space a bit.  So far he had an owl bow hanger, a pink bunny bank, and a lovely wooden jewelry box in his room as the sole decorations.  He's only one (for a few more weeks!) and could care less what his room looks like, as long as his slide and dog-dog were somewhere nearby.  But it made me a bit sad that I had made my daughter so many things for her room, trying to make it a special place for her, yet had neglected to so much as give him some crib sheets that weren't hand-me-downs (and pink with white stars, at that).  
The fabric I bought for the "baby" quilt I will one day make for him is water-y colors, with some pops of orange interspersed.  Rather than do an ocean theme room, though, I'm leaning towards just using this peachy aqua color scheme.  (Not orange and teal, by the way.  No way would my father-in-law let that slide.)
So, rather than actually making the quilt that will inspire his room decor, I thought I'd go easy and just do some basic crafty futzing around.  

"A is for Asher!"

I love the trendy chevron prints that are so popular in home decor now, so used that as a basis for his upper-case A.  It came out pretty nicely. 
 One day MacKenzie and I tore pictures from all of her completed worksheets and glued them to a canvas.  Just a simple coat of modge-podge, followed by a watered down wash of paint finished it.  It makes a neat opportunity for i-spy.

And I've been seeing these button letters on Pinterest a lot.  No, no original ideas here :)
I'm happy with the way they turned out, and the shadowbox effect of the frames.  I got unfinished frames, thinking I'd white wash them, but when I tried them as-is I kinda liked it.  What do you think?  

They won't stay leaning on the crib like this, though. That would be unsafe.


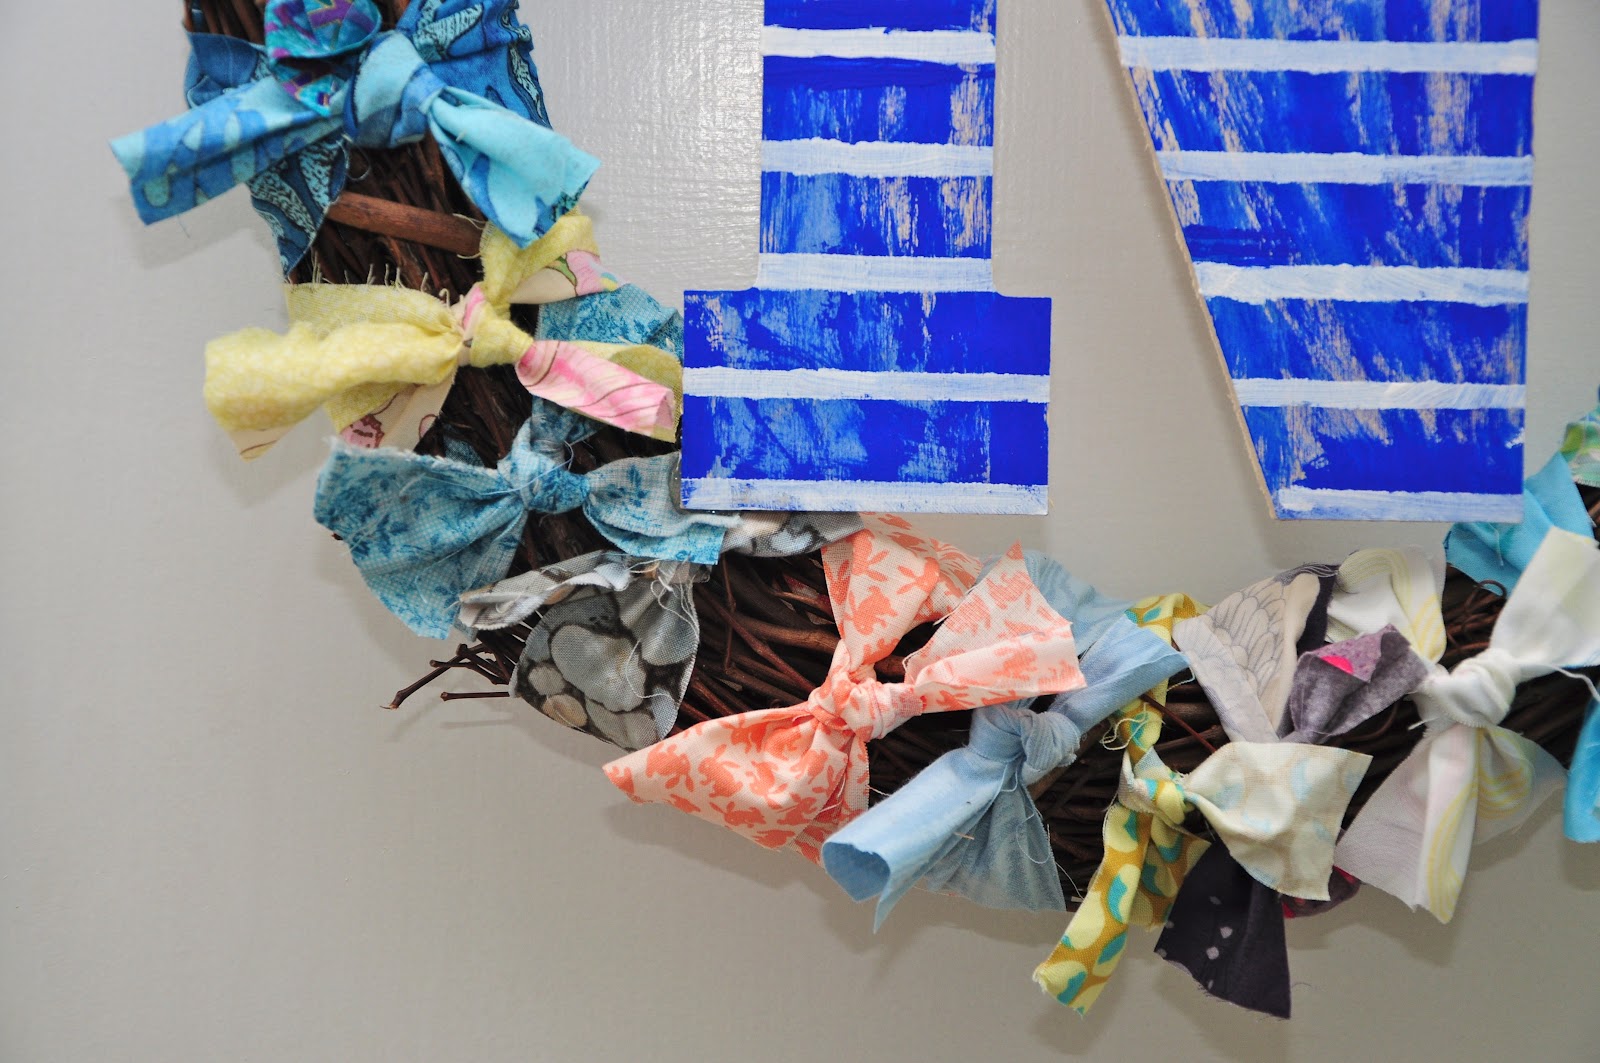
The monogram thing must have struck a chord in me somewhere, because I gravitated to this big wooden N next time I was in the fabric store.   I'm not completely sold on the paint treatment.  I tried to make it look weathered- but not sure if it just looks "poorly made" instead.  But I love the wreath itself.

Like most who quilt, I have a gi-normous bag of fabric scraps that I hoard away for the perfect project.  This is a great use for some. I like that I can remember the projects that the scraps came from- it's like a walk down memory lane each time I look at it.  


 I'm not sure any how-to is necessary here, but just in case:  Cut your fabric into relatively even strips and then knot them, spacing out colors as appropriate, around a grapevine wreath.  Trim the edges to a roughly even length.  Complex, huh?


I preferred the more organic look of the knotted side, but with more careful arrangement, the solid fabric wrapped side of this wreath could also look pretty cute.  Neat seasonal possibilities as well.  


That's all for today, folks.  I had a bag tutorial in the works, but my computer ate the images from my memory card before they were uploaded (grumble grumble!!).  Mr. has assured me he can retrieve them.  
We shall see.


Wednesday, July 25, 2012

Christmas in July

AKA- Science is cool.

AKA- I do it wrong, so you don't have to.  

Yes, Christmas.  It's early.  But this year I've vowed to make ALL the gifts we give.  I tried this last year, and while I did contribute a fair amount of homemade presents to the Domesstic Christmas bag, I got pulled in by the rampant consumerism of the season, and in the end, failed in my goal of a completely homemade holiday.  
I had been without crisp air and pine sap for so long, living on the west side of Oahu, that being here in Monterey has me feeling the winter-spirit year round.  The mornings almost always feel like there's a frost not far away, and the scent of pine wafting from the forest makes me want to take a swag home to the fireplace.  I think I'll wait until at least October to get nutso like that, though.  Or maybe September?


We found these funky pine cones on a nature stroll the other day, and it got me thinking of the ornaments I like to use as present toppers.  And since December really isn't all that far away in terms of the crafting calendar, I thought I might as well brew some cider and get to jolly-ing.  


See the fish face?  This guy came home with us, and will be painted up with those big kissy lips for someone special.  

This one reminded us of a little bird.  My daughter is totally enamored with birds, and I think she'd love adding this guy to our tree.  

Salt dough has a special place in our hearts and home (especially the grout)- I make a batch fairly regularly as it's inexpensive, easy, and I always have the ingredients on hand.  Kenzie and I started in on some of her presents by making some beads.  I think they'll actually look quite nice with some paint and perhaps some seed beads as adornment.


These little dudes are an homage to my favorite salt dough creation- these hideous elves I made a few years back for an  ornament exchange.  Aren't they cute? ;)  A note...  that hair?  Garlic press!  


But what this post is really about is science.  And snowflakes.  


In my surfing of the blogosphere looking for Christmas inspiration, I came across some beautiful images of crystalized snowflakes made from Borax.  The instructions were aimed at elementary students, so I thought it'd be a wonderful project for the girl and I.  

We made some pipe cleaner forms, and tied them by thread to skewers.  The instructions told me to put one to a jar, and to use a certain ratio of Borax to boiling water.


I may have mentioned this before, but I hate recipes and instructions.  I rarely read them, and it rarely works out in my favor.  I'm not sure why this hasn't sunk in yet.
I thought hey, we could make even more snowflakes if we used a large bowl, so grabbed a big mixing bowl and filled it up with warmish water (I didn't want to wait for it to boil) and some odd scoops of borax.
Scientific.  
We also added some blue food coloring for pizazz.


The original instructions did mention that is was important that the container remained undisturbed.  Since we had started our project on the kitchen floor, I now had to booby trap the area to prevent tampering.  


I also locked my son out....


We went to bed, with the girl really really excited for her science project.  We had talked about the formation of crystals and all the learny type stuff, so if you try this at home (the right way) be sure to add that in.  It's pretty cool, actually. (Brief explanation stolen from the internets: 
 "Hot water holds more borax crystals than cold water. That's because heated water molecules move farther apart, making room for more of the borax crystals to dissolve. When no more of the solution can be dissolved, you have reached saturation. As this solution cools, the water molecules move closer together again. Now there's less room for the solution to hold onto as much of the dissolved borax. Crystals begin to form and build on one another as the water lets go of the excess and evaporates." )


Anyway, in the morning, she came to get me, to take the snowflakes out and see how it worked.

It didn't.


Sensing the disappointment, I swallowed my pride and set out to do it the RIGHT way. 
So, here.  You can to.  


 You'll need pipe cleaners, Borax (sometimes called 20 Mule Strong), string, a large jar (6 cup canning jars are awfully convenient), and water.
Food coloring is optional.


Make your snowflake forms, being sure that they can fit through the mouth of the jar without bending.  Tie some thread to the end of one point, and then determine the length you'll need to dangle it inside the jar.  Be aware that the thread that is actually in the water will gather crystals as well.  Once you have the desired length, attach it to a pencil or chopstick or something to hold it above the jar.  


Pur in six cups of boiling water, and then add one cup of Borax.  Stir until it's all dissolved.  


Add the snowflakes, and then leave the jar alone.  If possible, leave the house.  Nothing will happen for several hours, and staring at it will be extremely frustrating.


But after three hours or so, as the water cools, you'll start to see little crystals floating about, settling here and there inside the jar.   Now go away again.

In a few more hours, you'll have a nice chunky crystalized snowflake.  Carefully remove it from the jar and admire the beauty of science. 


This one is two forms, crystalized into one unit.  It's actually pretty sturdy.


 Also, don't freak when you see all those crystals stuck in the jar.  Add more boiling water, give a bit of a stir, and they'll come right off.  You can do it over and over.  


While I've got you here, I wanted to share something pretty cool.  Now that you have mason jars, you can take the rims to make PERFECT poached eggs (I know...off topic.  What, Borax doesn't make you feel like breakfast?).  Just put the rims on the bottom of the pot, and gently spoon the egg into the rim.  When they've cooked, remove with a slotted spatula and flip.  They'll be amazing.  I love poached eggs, especially eggs benedict, and still get a kick out of this little trick.

Sigh, and now I'm hungry.


 Merry Christmas in July, everyone.  If you make any of these groovy snowflakes, show 'em off!  And for those in my family- pretend to be surprised with your new super-fancy ornaments come December :)